


Table of Contents
Introduction
Installation and setup
Terraform Modules
Implementation and work flow
Github Code :- https://github.com/SahadevDahit/Terraform-three-tier-deploy
Youtube
Introduction
Terraform is an infrastructure as code (IaC) tool used for building, changing, and versioning infrastructure safely and efficiently. Its primary use cases include:
Provisioning Infrastructure: Terraform allows you to define your infrastructure in code using a declarative configuration language, then provision it across various cloud providers, on-premises environments, and other service providers.
Managing Multi-Cloud Environments: Terraform enables users to manage infrastructure across multiple cloud providers like AWS, Azure, Google Cloud, and others, providing a unified workflow for provisioning and managing resources.
Immutable Infrastructure: With Terraform, you can define your infrastructure as immutable, meaning you treat infrastructure as disposable and recreate it entirely from code whenever changes are needed. This helps ensure consistency and reliability.
Continuous Delivery and Deployment: Terraform integrates with CI/CD pipelines, allowing you to automate the deployment of infrastructure changes as part of your continuous delivery workflow. This speeds up the process of delivering applications and infrastructure changes.
Infrastructure Versioning and Collaboration: Terraform configurations are stored as code, enabling version control with tools like Git. This facilitates collaboration among team members and provides a history of changes to the infrastructure over time.
Infrastructure Orchestration: Terraform can orchestrate complex infrastructure setups involving multiple components and dependencies, ensuring that resources are provisioned in the correct order and with the necessary configurations.
Disaster Recovery and High Availability: By defining infrastructure as code, Terraform allows for easily replicating infrastructure setups across different regions or environments, facilitating disaster recovery and high availability strategies.
Some important terms
VPC:
- A virtual network you create in AWS to isolate your resources.
Public Subnet:
- A subnet within a VPC where instances can have public IP addresses and access the internet directly.
Private Subnet:
- A subnet within a VPC where instances cannot have public IP addresses by default. They are typically used for resources that don't need direct internet access but can communicate with the internet through a NAT Gateway (optional).
NAT Gateway (Optional):
- A service that allows instances in private subnets to access the internet without directly exposing them publicly. It translates private IP addresses to a public IP for outbound traffic.
Internet Gateway:
- A gateway that allows resources in your VPC to access the internet.
Route Table:
- A table that defines how traffic is routed within your VPC. You can have separate route tables for public and private subnets to control traffic flow.
AWS CLI:
The AWS CLI is a tool to manage AWS resources from your command line. It lets you automate tasks, work efficiently, and access a wide range of AWS services.
Installation and setup
Go to the download link
Download according to your operating system
If you are using the Windows version, download the zip file and extract.
Then move the extracted folder to the c drive inside program files.
Then copy the path of the folder and add it to the system enviroment variables.

Then we also need to install the aws cli, For this
Go to the given link and download according to your operating system
https://docs.aws.amazon.com/cli/latest/userguide/getting-started-install.html
then open command prompt
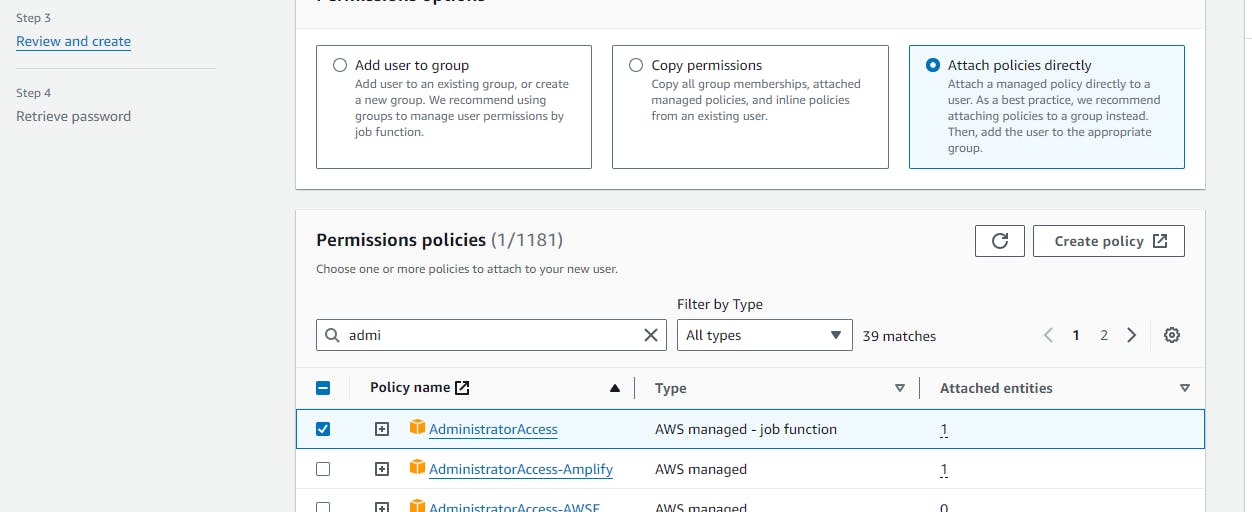
After that, create the new IAM user with the administration permission and generate the access key

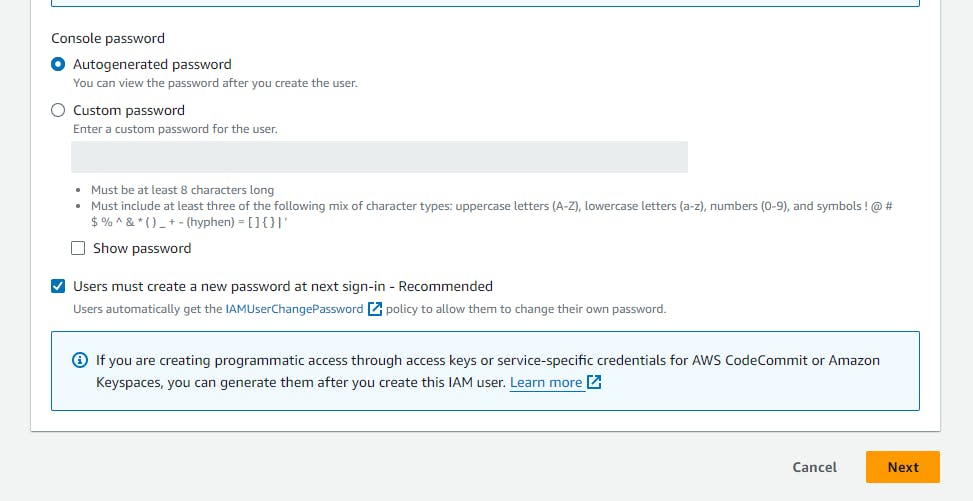

Then open command prompt and type aws configure and provide the necessay secret key and access key id

Terraform Modules
Folder structure

The Terraform module architecture follows a modular and reusable design pattern, allowing users to encapsulate related resources, configurations, and logic into self-contained units. These modules can be shared, reused, and composed to build complex infrastructure in a modular and maintainable manner. Here's a breakdown of the Terraform module architecture:
Module Structure:
A Terraform module is a directory containing one or more
.tffiles that define resources and configurations.The module directory typically includes a
main.tffile defining the primary resources and configurations, along with other files for variables, outputs, and providers if needed.
Inputs (Variables):
Modules accept inputs through variables, allowing users to customize module behavior and configurations.
Variables can be defined within the module or passed externally when using the module.
Inputs can include various types such as strings, lists, maps, and complex types.
Outputs:
Modules can expose outputs, which are values derived from module resources or computations.
Outputs allow users to access and use information from the module in other parts of their Terraform configurations.
Outputs are defined using the
outputblock within the module's.tffiles.
Composition:
Modules can be composed and nested within each other to build complex infrastructure.
Modules can call other modules, passing input variables and utilizing their outputs.
This composition allows for building reusable building blocks and promoting modularity.
Reuse and Sharing:
Modules can be reused across multiple projects and environments.
Modules can be shared within an organization or with the community through Terraform Registry or version control systems.
Reusing modules promotes consistency, reduces duplication, and accelerates infrastructure development.
Versioning and Dependency Management:
Modules can be versioned to manage changes and ensure consistent behavior across different deployments.
Version constraints can be specified to control module dependencies and ensure compatibility with other modules and Terraform versions.
Providers and Backend Configuration:
Modules can specify provider configurations and backend settings to define where resources are provisioned and how state is managed.
Provider configurations and backend settings can be defined within the module or passed externally when using the module.
Certainly! Terraform uses various file types and mechanisms to manage configurations, state, and variables. Here's an overview of the most common file types used in Terraform projects:
Main Configuration Files (.tf):
Terraform configuration files typically have a
.tfextension.These files define the infrastructure resources and configurations using HashiCorp Configuration Language (HCL) syntax.
The main configuration file is often named
main.tf, but you can have multiple.tffiles within a directory.
Variables File (variables.tf):
The
variables.tffile is used to define input variables for your Terraform modules.Variables define parameters that can be customized when running Terraform commands.
Variables can have default values and constraints such as type, description, and validation rules.
Environment Variables:
Terraform allows you to set certain configuration options via environment variables.
Environment variables are prefixed with
TF_VAR_followed by the variable name.This mechanism is useful for providing sensitive or environment-specific values without hardcoding them in configuration files.
Terraform State File (terraform.tfstate):
The Terraform state file (
terraform.tfstate) is a JSON file that tracks the current state of your infrastructure managed by Terraform.It records resource metadata, dependencies, and attribute values.
The state file is crucial for Terraform to understand the existing infrastructure and manage changes safely.
By default, Terraform stores the state file locally, but it can also be stored remotely in services like Terraform Cloud, AWS S3, or Azure Storage.
Terraform State Backup File (terraform.tfstate.backup):
Terraform creates a backup of the state file (
terraform.tfstate.backup) before performing destructive operations liketerraform apply.This backup file helps in recovering the previous state in case of errors or failures during the Terraform operation.
Variable Definitions File (.tfvars):
The
.tfvarsfiles contain variable values that override the default values defined invariables.tf.These files provide a convenient way to specify variable values without modifying the main configuration files.
Multiple
.tfvarsfiles can be used, and their values can be passed to Terraform using the-var-fileoption or automatically loaded based on naming conventions.
Provider Configuration File (provider.tf):
A
provider.tffile can be used to define provider configurations, including provider versions, credentials, and settings.While provider configurations can also be defined directly in the main configuration files, separating them into a dedicated file can enhance organization and clarity, especially in larger projects.
terraform {
  required_providers {
    aws = {
      source  = "hashicorp/aws"
      version = "~> 5.0"
    }
  }
}
# Configure the AWS Provider
provider "aws" {
  region = var.region
}
1. terraform block:
This block declares the Terraform configuration version. It's a comment and doesn't require any action.
2. required_providers block:
This block specifies the providers required for your Terraform configuration. In this case, it defines the aws provider.
source: This specifies the location of the Terraform provider for AWS. Here, it uses the official provider from HashiCorp (hashicorp/aws).version: This defines the version constraint for the AWS provider. The~> 5.0syntax allows any version greater than or equal to 5.0 but less than the next major version (e.g., 6.0). This ensures compatibility with future minor releases while avoiding potential breaking changes from major version updates.
3. provider "aws" block:
This block configures the AWS provider itself.
region: This argument specifies the AWS region where your infrastructure will be deployed. The value is typically set using a variable namedregion(defined elsewhere in your configuration).
# variables.tf

variable "vpc_cidr_block" {
  description = "CIDR block for the VPC"
}

variable "private_subnet_name" {
  description = "List of names for private subnets"
  type        = list(string)
}

variable "environment" {
  description = "Environment tag value"
}

variable "owner" {
  description = "Owner tag value"
}

variable "ami_id" {
  description = "AMI ID for the instances"
}

variable "instance_type" {
  description = "Instance type for the instances"
}


variable "internet_gateway_name" {
  description = "Name of the internet gateway"
}
variable "key_name" {
  description = "Name of the key pair to use for SSH access"
}


variable "nat_gateway_name" {
  description = "Name of the nat gateway"
}


variable "region" {
  description = "Name of the region"
}
These variables provide a way to customize your Terraform configuration without hardcoding values directly in the code. This makes your configuration more reusable and easier to manage.
main.tf file
# # main.tf
# Define the VPC module
module "vpc" {
source = "./modules/vpc_module"
vpc_cidr_block = var.vpc_cidr_block # Pass the variable to the module
environment = var.environment
owner = var.owner
}
# Define the subnet module
module "subnets" {
source = "./modules/subnets"
vpc_id = module.vpc.vpc_id
vpc_cidr_block = var.vpc_cidr_block
private_subnet_names = var.private_subnet_name # List of public subnet names
}
module "igw" {
source = "./modules/internet_gateway"
vpc_id = module.vpc.vpc_id
internet_gateway_name = var.internet_gateway_name
}
module "route_table" {
source = "./modules/route_table"
vpc_id = module.vpc.vpc_id # Assuming you have already created the VPC
internet_gateway_id = module.igw.internet_gateway_id # Assuming you have already created the internet gateway
public_subnet_ids = module.subnets.public_subnet_ids # Using the output from subnet module
private_subnet_ids = module.subnets.private_subnet_ids # Using the output from subnet module
public_route_table_name = "public-route-table"
private_route_table_name = "private-route-table"
nat_gateway_id = module.nat_gateway.nat_gateway_id[0] # Pass NAT Gateway ID to route_table module
}
module "security_group" {
source = "./modules/security_group"
vpc_id = module.vpc.vpc_id # Assuming you have already created the VPC
security_group_name = "example-security-group"
security_group_description = "Example security group allowing ports 80, 4000, 8080, 9000, 443"
}
# Define EC2 Public Instance
module "ec2_public_instance" {
source = "./modules/ec2_instance"
subnet_id = module.subnets.public_subnet_ids
security_group_id = module.security_group.security_group_id
key_name = var.key_name
ami_id = var.ami_id
instance_type = var.instance_type
public_instance_status = 0
}
# Define EC2 Private Instance
module "ec2_private_instance" {
source = "./modules/ec2_instance"
subnet_id = module.subnets.private_subnet_ids
security_group_id = module.security_group.security_group_id
key_name = var.key_name
ami_id = var.ami_id
instance_type = var.instance_type
public_instance_status = 1
}
# Use the Elastic IP module
module "elastic_ip" {
source = "./modules/elastic_ip"
}
# main.tf
module "nat_gateway" {
source = "./modules/nat_gateway"
allocation_id = module.elastic_ip.elastic_ip_allocation_id
subnet_id = module.subnets.public_subnet_ids
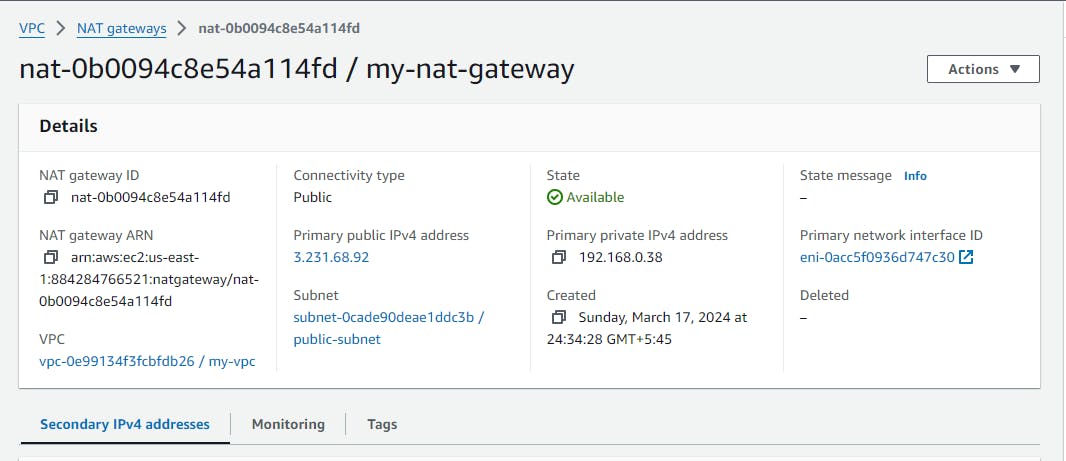
nat_gateway_name = "my-nat-gateway"
}
Overall Structure:
Modular design for reusability and organization.
Key components created in a specific order for proper dependencies.
Components:
VPC:
Foundational network infrastructure.
Defined using the
vpc_module.
Subnets:
Public and private subnets for network segmentation.
Defined using the
subnetsmodule.
Internet Gateway:
Enables internet access for the VPC.
Defined using the
internet_gatewaymodule.
Route Tables:
Manage traffic flow within the VPC.
Separate routes for public and private subnets.
Use a NAT gateway for private subnet internet access.
Defined using the
route_tablemodule.
Security Group:
Controls inbound and outbound traffic for instances.
Defined using the
security_groupmodule.
EC2 Instances:
Public and private instances launched in respective subnets.
Defined using the
ec2_instancemodule.
Elastic IP:
Provides a static public IP address.
Defined using the
elastic_ipmodule.
NAT Gateway:
Enables private subnet instances to access the internet indirectly.
Defined using the
nat_gatewaymodule.
Key Points:
Well-structured and modular Terraform configuration.
Logical sequence for resource creation with module dependencies.
Covers essential VPC components for a secure and functional setup.
Implementation and work flow

Here, when we apply the terraform then the following resources will be created
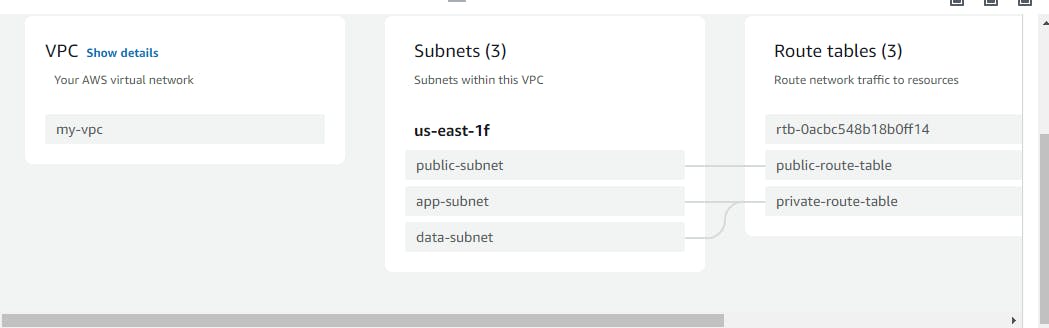
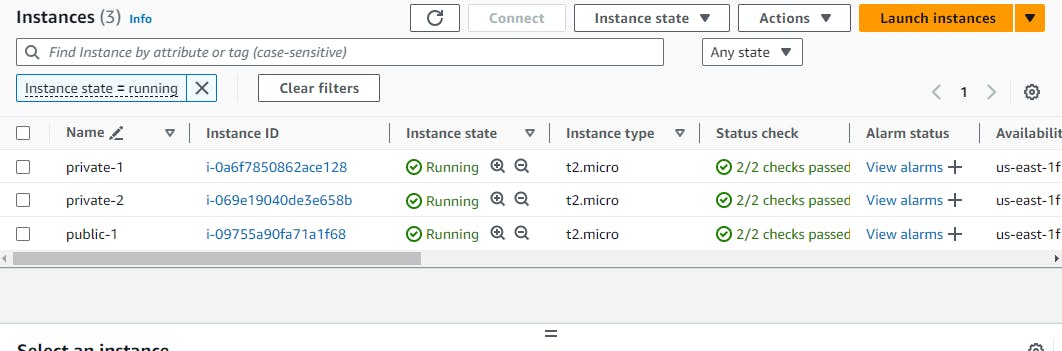
VPC along with the one public and two private subnet i.e. app-subnet and data-subnet
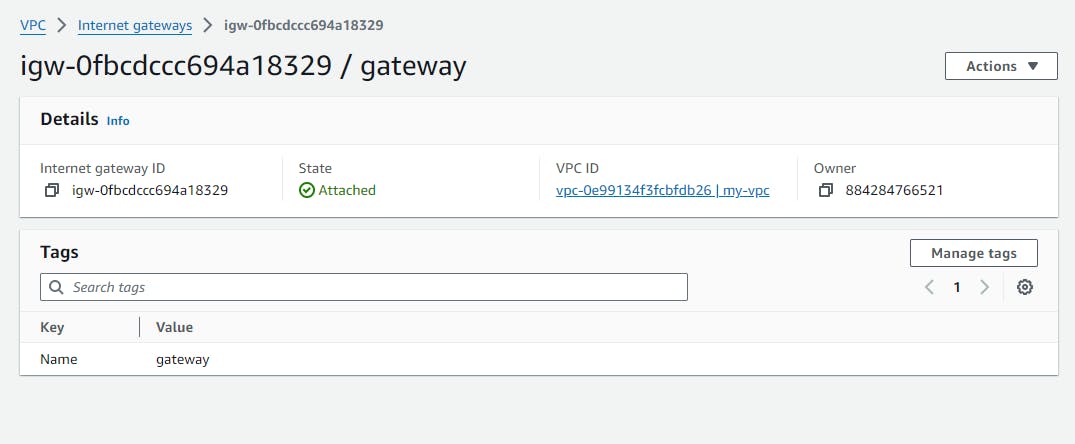
Internet Gateway attached to the vpc
Nat Gateway attached to the public subnet
And two route table. One is public route table attached to the internet gateway and private route table attached to the nat gateway
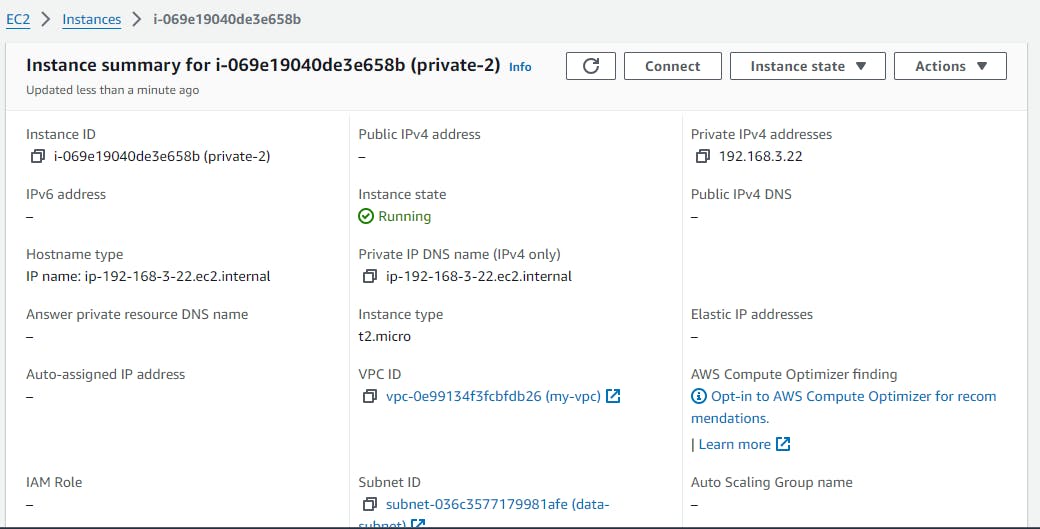
In public subnet we deploy the frontend, and in the app-subnet(private subnet) we deploy the backen and in the data-subnet we deploy the database
We access the private subnet ec2 instances from the public subnet ec2 instance
NAT Gateway is a managed AWS service that facilitates outbound internet access for instances in private subnets while maintaining a secure and controlled environment within a VPC. It provides a scalable and reliable solution for enabling internet connectivity for resources that need it while maintaining security and control.
Now run the command
terraform init
terraform validate
terraform plan
terraform apply
# when you want to free up your resources
terraform destroy
The commands you listed provide a step-by-step workflow for using Terraform to manage your infrastructure as code:
1. terraform init:
This command initializes the Terraform working directory.
It downloads and installs any required plugins based on the configuration files you have in your Terraform directory (e.g.,
modules).It also initializes the Terraform state file, which stores information about the infrastructure you manage with Terraform.
2. terraform validate:
This command validates your Terraform configuration files for syntax errors and potential issues.
It checks if the Terraform configuration is well-formed, references resources and providers correctly, and uses valid variable names and types.
Running this before applying your configuration helps identify any errors early on.
3. terraform plan:
This command generates an execution plan for your Terraform configuration.
It shows what Terraform will do based on your current configuration and the state of your infrastructure (if any exists).
The plan will list the resources that will be created, updated, or destroyed.
This is a crucial step to review what changes Terraform will make before actually applying them.
4. terraform apply:
This command applies the changes outlined in the execution plan generated by
terraform plan.It creates, updates, or destroys resources in your AWS environment based on your Terraform configuration.
Important: It's recommended to carefully review the plan output before applying to avoid unintended resource creation or modification.
5. terraform destroy (when you want to free up your resources):
This command destroys the infrastructure managed by your Terraform configuration.
It removes the resources Terrafom created or managed based on your configuration.
Important: Use this command with caution, as it can permanently delete your resources. It's recommended to back up your Terraform state before running
destroy.
In summary, these commands provide a safe and controlled workflow for managing your infrastructure using Terraform:
Initialize and validate your configuration.
Preview changes with
plan.Apply the desired changes with
apply.Destroy resources when no longer needed with
destroy(use with caution).
Then open your aws account with the same iam user as configured in the aws cli
and you will get the following result


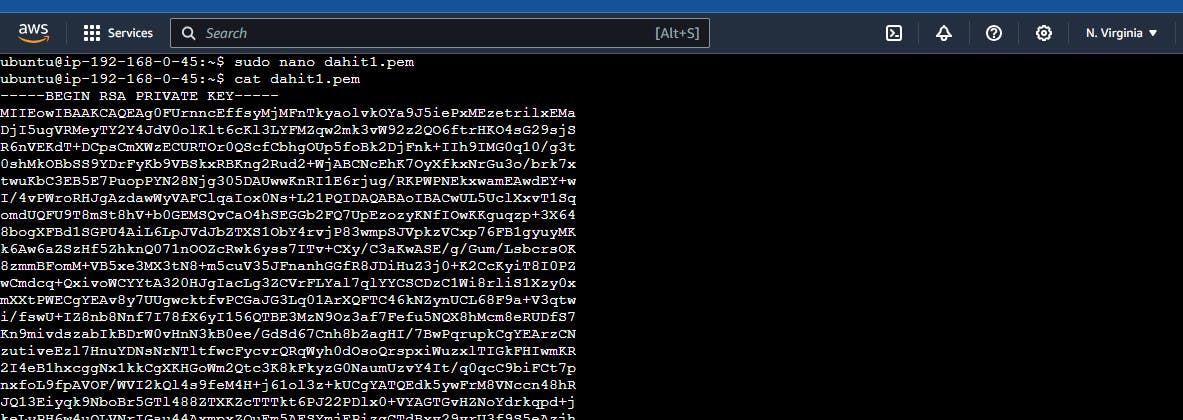
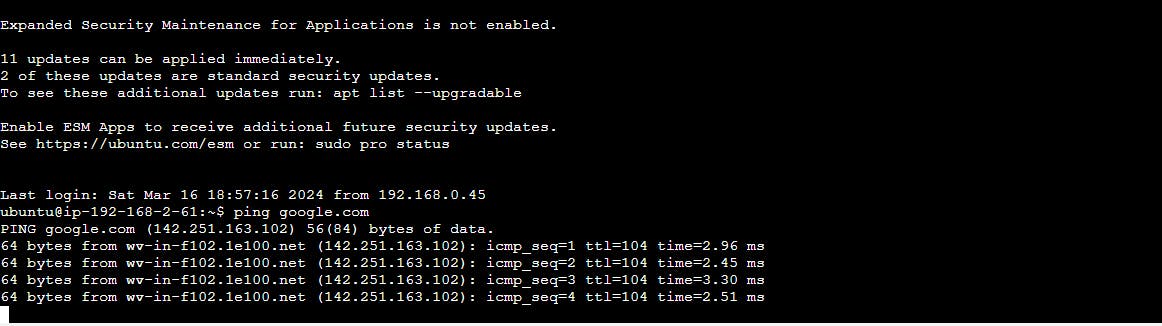
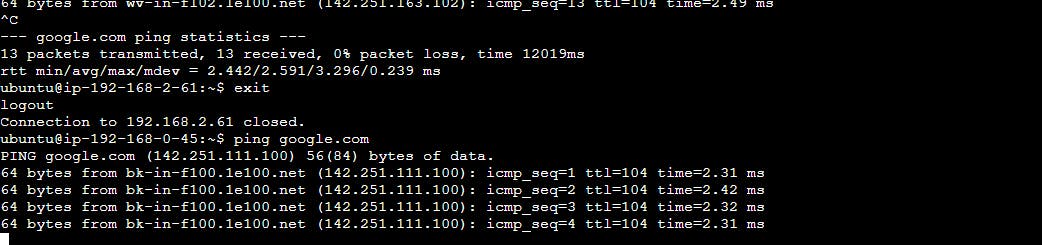
now connect to the public instance


then either use or create the key pair to ssh to the private ec2 from the public one and ping the google to check the internet flow


In this way, we implement the three tier architecture using terraform in AWS
Thanks for reading..................................................